Easy DIY Bedroom Makeover for a Boho Teen Bedroom


My niece Kennedy had been asking me to redo her bedroom for almost a year, and I just had to make it happen. At 10 years old, she had already planned out her dream space, full of cozy textures, boho vibes, and yes…a whole lot of pink, which is definitely not my usual style. But I was excited to step outside of my comfort zone and bring her vision to life.
The best part? This bedroom makeover came together with simple DIY projects and easy updates that completely transformed the space without needing a full renovation. If you’re looking for an easy way to refresh a kid or teen bedroom, this makeover might just inspire you.
This post contains affiliate links, which helps support more projects on my website! For my full disclosure policy regarding affiliate links, click here!
Want to see this build in action? You can watch my build video here (+ make sure to subscribe to my channel)!
Tools + Materials
Tools
Materials
Decor
1. Planning Session

Before we picked up a paint roller or assembled a single piece of furniture, Kennedy and I sat down to dream up her perfect “big girl bedroom.”

She came prepared with a full vision: a trundle bed for sleepovers, floating shelves, a honey-brown desk with a filing cabinet, gold accents, wallpaper, white walls, and of course…lots of pink. Not exactly my usual style.
The best part about this makeover was that we didn’t need to tear the whole room apart or do anything overly complicated. With a little paint, peel-and-stick wallpaper, some affordable decor, and a few simple upgrades, this room transformed quickly.
2. Preliminary Furniture Assembly + Clearing Out

Kennedy cleared out her room so we could start fresh, and honestly, I was so proud of how involved she wanted to be in the process.

Instead of just waiting for the finished reveal, she jumped right in to help make it happen.

One of my favorite parts? Watching her assemble a lot of the furniture mostly on her own.

It reminded me so much of learning DIY skills from my dad when I was younger. That’s one of the reasons I love projects like this. Even simple room makeovers can become really fun memories and confidence-building experiences.
3. Paint

Before painting, Kennedy took charge of protecting the floors by rolling out paper.

While I patched wall imperfections using this spackle product that dries in 15 minutes.

Since it dried so fast, we were able to paint the very same day, which kept this makeover moving quickly.

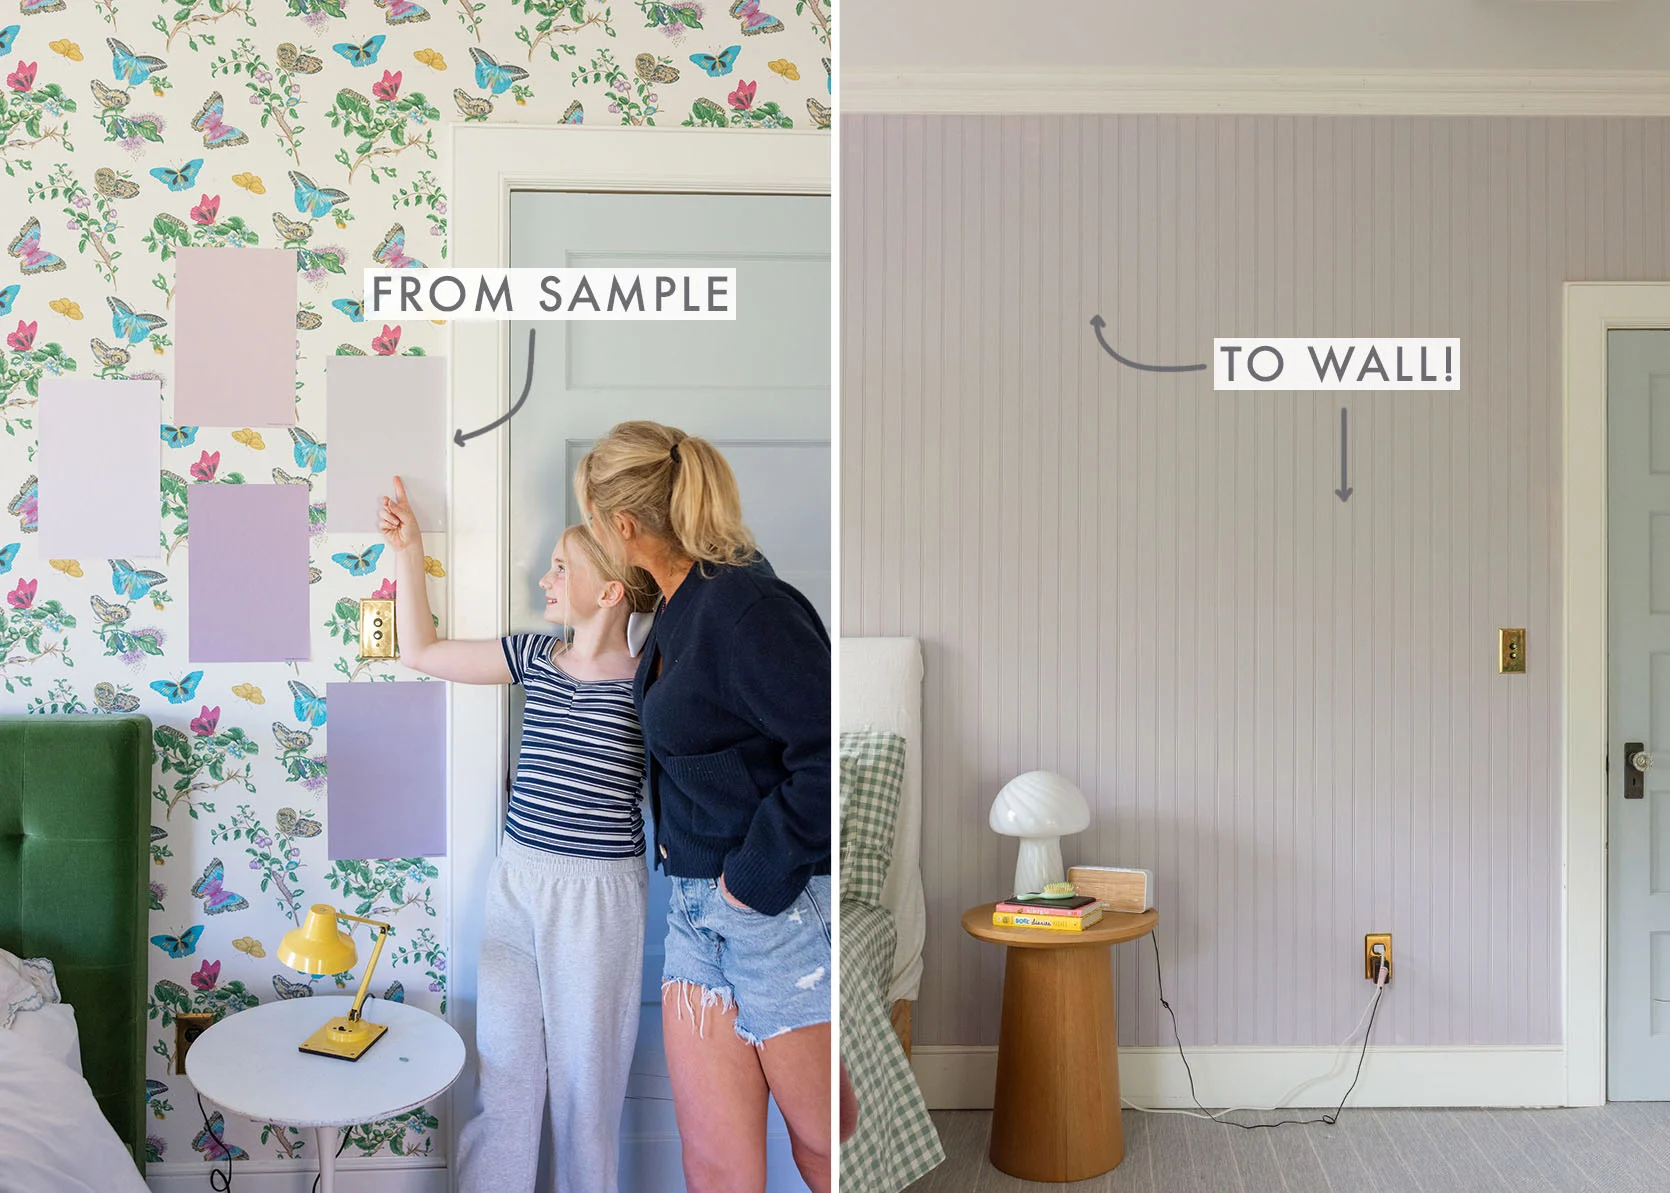
In Kennedy’s words this color was perfect, “not too pop-y”. Honestly? Fair enough.

As we painted, I showed her the classic “W” and “V” rolling technique to help blend everything evenly across the walls.

Between the painting and a few spontaneous dance-party breaks (plus plenty of laughing), this ended up being one of my favorite parts of the whole project.
And if you’re looking for an easy, budget-friendly way to refresh a bedroom, paint is probably the biggest bang for your buck. A fresh wall color can instantly change a space.
4. Wallpaper

One of the non-negotiables for Kennedy’s room makeover? Wallpaper. And honestly, I was intimidated. I had never installed wallpaper before, so naturally I watched a lot of YouTube tutorials and hoped for the best.

To make things easier, I cut the wallpaper into manageable strips and used a level to mark a straight vertical line on the wall so everything stayed aligned.


I used a scraper to smooth out bubbles as I worked and trimmed the excess at the bottom once each piece was in place.

Luckily, this peel-and-stick wallpaper made the process much less stressful. No messy glue, and if a piece was crooked, I could peel it back and reposition it.

Now, pink florals are definitely not my usual style, but I have to admit, I really ended up loving this wallpaper. It felt fun and youthful while still looking timeless enough to grow with her.
Did it take me four and a half hours to finish one wall? Yes. But if I can successfully install wallpaper for the first time, you definitely can too.
5. Decor

While Kennedy was away at camp, I made it my mission to finish the room and surprise her before she got home.

I started by swapping the old ceiling fan for a smaller, trendier option that instantly made the room feel refreshed.

Since Kennedy wanted pink curtains, I paired them with a gold curtain rod to bring in some of the gold accents she had requested.

We also added the honey brown desk with the matching filing cabinet she had been dreaming about.


To finish the space, I layered in simple decor like a gold mirror, floral artwork, floating shelves, cozy pillows, plants, and warm lighting.

One of my favorite easy wins was the gallery wall.

The frames came with a hanging template, which made installation surprisingly simple.


I just leveled the template, added nails, and hung everything up.

This room was definitely outside of my normal style, so I appreciated how a few easy decor choices helped everything come together without overcomplicating the process.

Kennedy wanted those floating shelves so I quickly installed the brackets and put up the shelves.


She also got fluffy pillows, plants, candles and a desk chair of course. After these finishing touches the only thing left was to see what Kennedy thought of her new room!

Kennedy’s Thoughts

The best part of any makeover is seeing the reaction.

The excitement level was through the roof! “Oh my god it doesn’t even look like my room!”

This was one happy girl, well two happy girls. I’m really pleased with how this turned out!

She was especially excited about the trundle bed for sleepovers, the floating shelves, and all of the little details that made the room feel more grown up (like the cute side tables)!

I also made sure to include some of her favorite items from her old room so the space still had some of Kennedy’s personality.
She loved how this fan was much smaller than the old fan but worked just as well!


And yes, the rug was a huge hit.


I’m so happy with how this bedroom makeover turned out. Not only did Kennedy get the cozy, boho-inspired room she had been dreaming about, but this project also proved that you don’t need a huge renovation budget or advanced DIY skills to completely transform a space.
With a little paint, peel-and-stick wallpaper, and a few thoughtful decor updates, this bedroom feels brand new.
Most importantly, getting to do this project with Kennedy made it extra special. She was the perfect DIY buddy, and I already can’t wait for our next project together. If you’ve been wanting to refresh a bedroom in your own home, hopefully this makeover inspires you to go for it.
Happy DIYing, friends!
Save this for later
I hope you enjoyed this project! If so, make sure to Pin It for later!