Bay, Arched, Clerestory, And Just Plain Awkward: Here’s How To Cover Every Tricky Window In Your House

Like the jewelry to your wardrobe, window coverings can make-or-break your room’s look. And if that wasn’t pressure enough, they can be hard to figure out (and not to mention incredibly budget-busting). We’ve written so many curtain posts around these parts—like this whole home cheat sheet, this one about real reader homes, and this Google-famous one—and yet, there is still more to talk about. Today’s post was born out of my own need to figure out something in my new home, as my recent articles have been. The topic? How to cover classically tricky windows.
In my living room, which I’ll talk you through in a minute, I have one wall with four—I repeat, FOUR types of windows, in three sizes. It’s pretty funky, but I appreciate the light they bring in, so I’m not here to complain, just to tinker and figure things out. I wouldn’t want to upset the natural light gods and go back to a home where I always had to have the overhead lights on (my previous spot). So while I’ll cover four other head-scratching varieties of windows, let’s begin with mine: The uneven or multi-sized windows all in a row.
Tricky Window #1: Uneven or Multi-Sized Windows in a Row
Alright, let’s start by looking at my current living room window setup.

From left to right, we have a non-opening little clerestory up high, then the door out to our patio (with a transom). Right of that is, nope, not another door, although it looks nearly identical, but rather just a window made to look like a door with another transom. My guess is maybe this should have been a French door or even a sliding door, but for whatever reason, they did this. ::Shrug:: And then finally, the only window that actually opens at the far right. It’s tall, and the top of the molding sits about one inch above the middle two windows/doors, but it does match the height of the far left window. I’ll never understand why choices like this are made by builders. My architect husband would likely tell me that perhaps they had a reason for doing it, or the way the doors were framed out happened before the window schedule, and then they didn’t match up. Whatever, it’s silly.
So, what exactly is the solution to making this look better and getting some softness (privacy isn’t an issue as there are already blinds and a shade up)? I drafted up three choices, one that doesn’t really work, and two that do for a single reason.
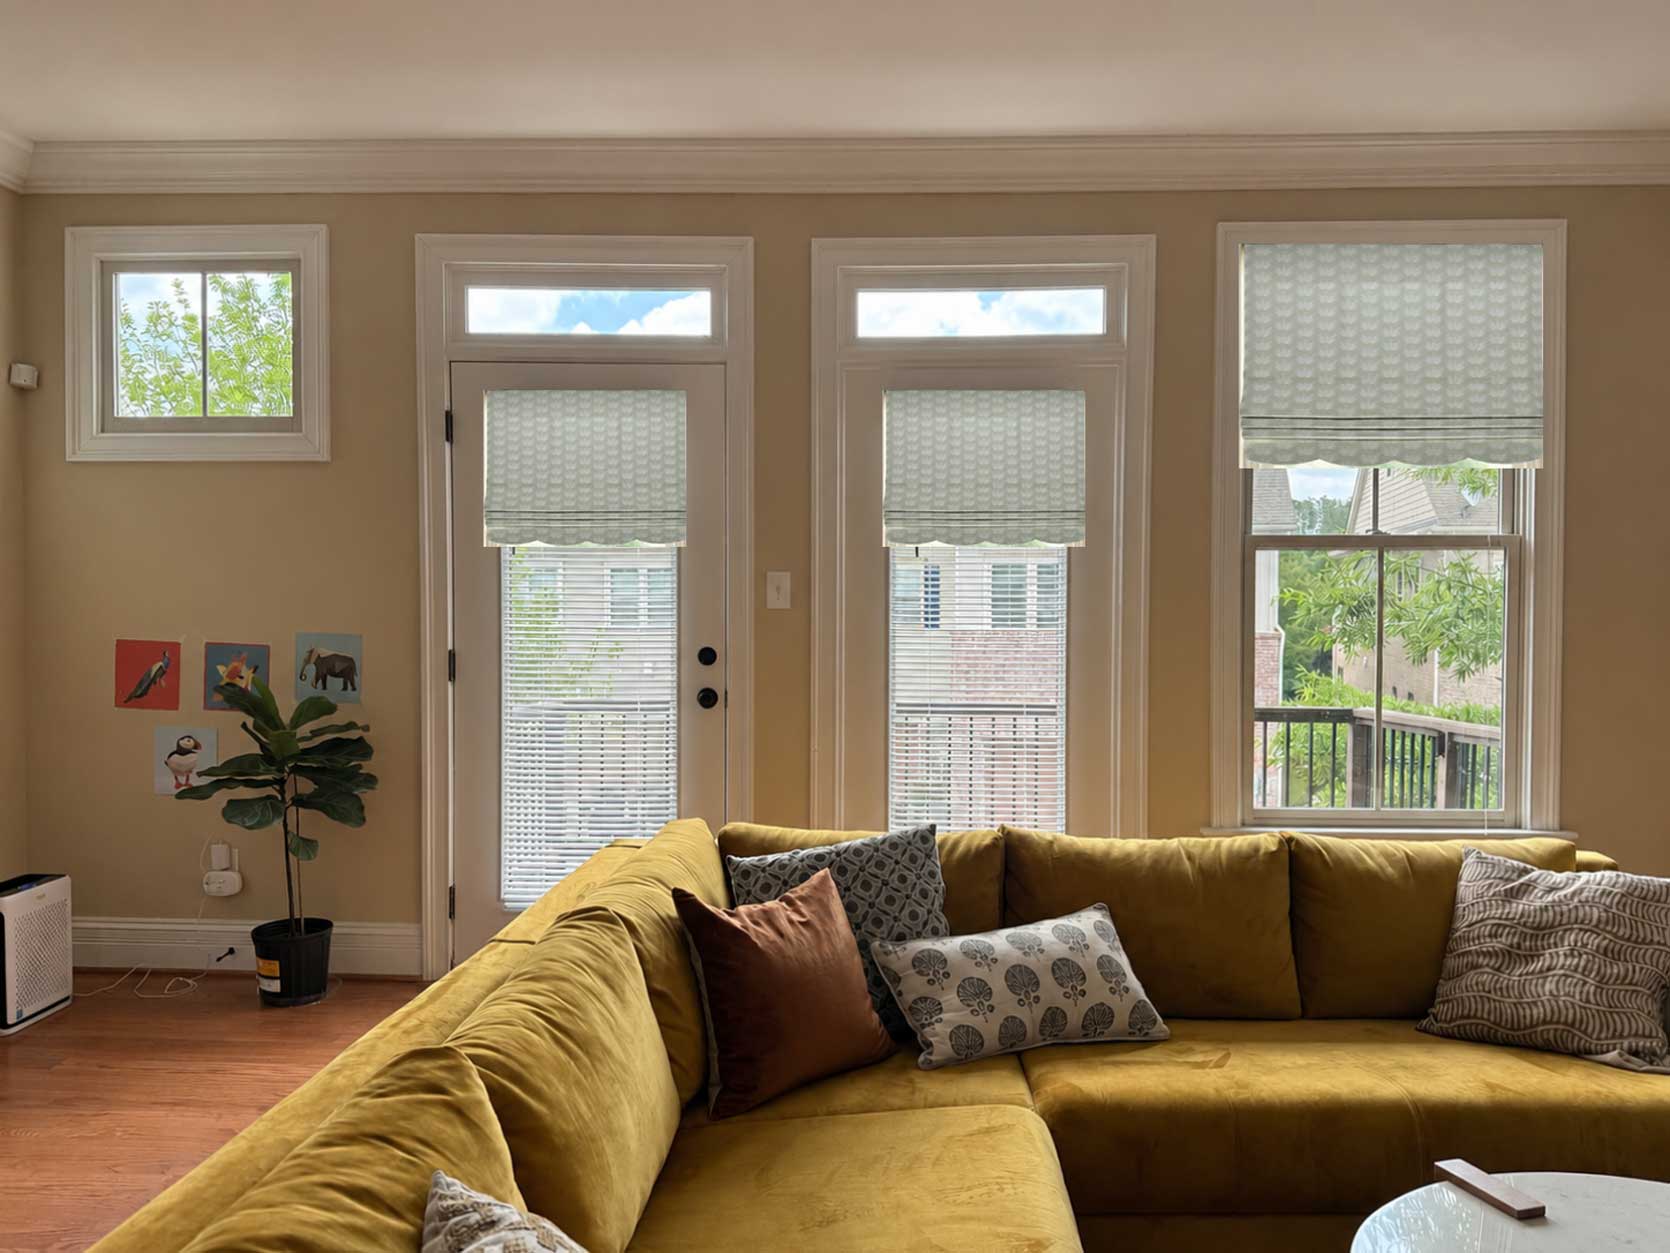
Here’s what I think doesn’t work that well: Putting two small Roman shades on the door and door-shaped window, then putting a similar Roman shade but larger higher up on the right window. Though the fabric of the Roman shade adds nice pattern and color, it all still feels pretty jumpy. But here are two ways to make it work if you have a similar issue.
Outside Mount Roman Shades
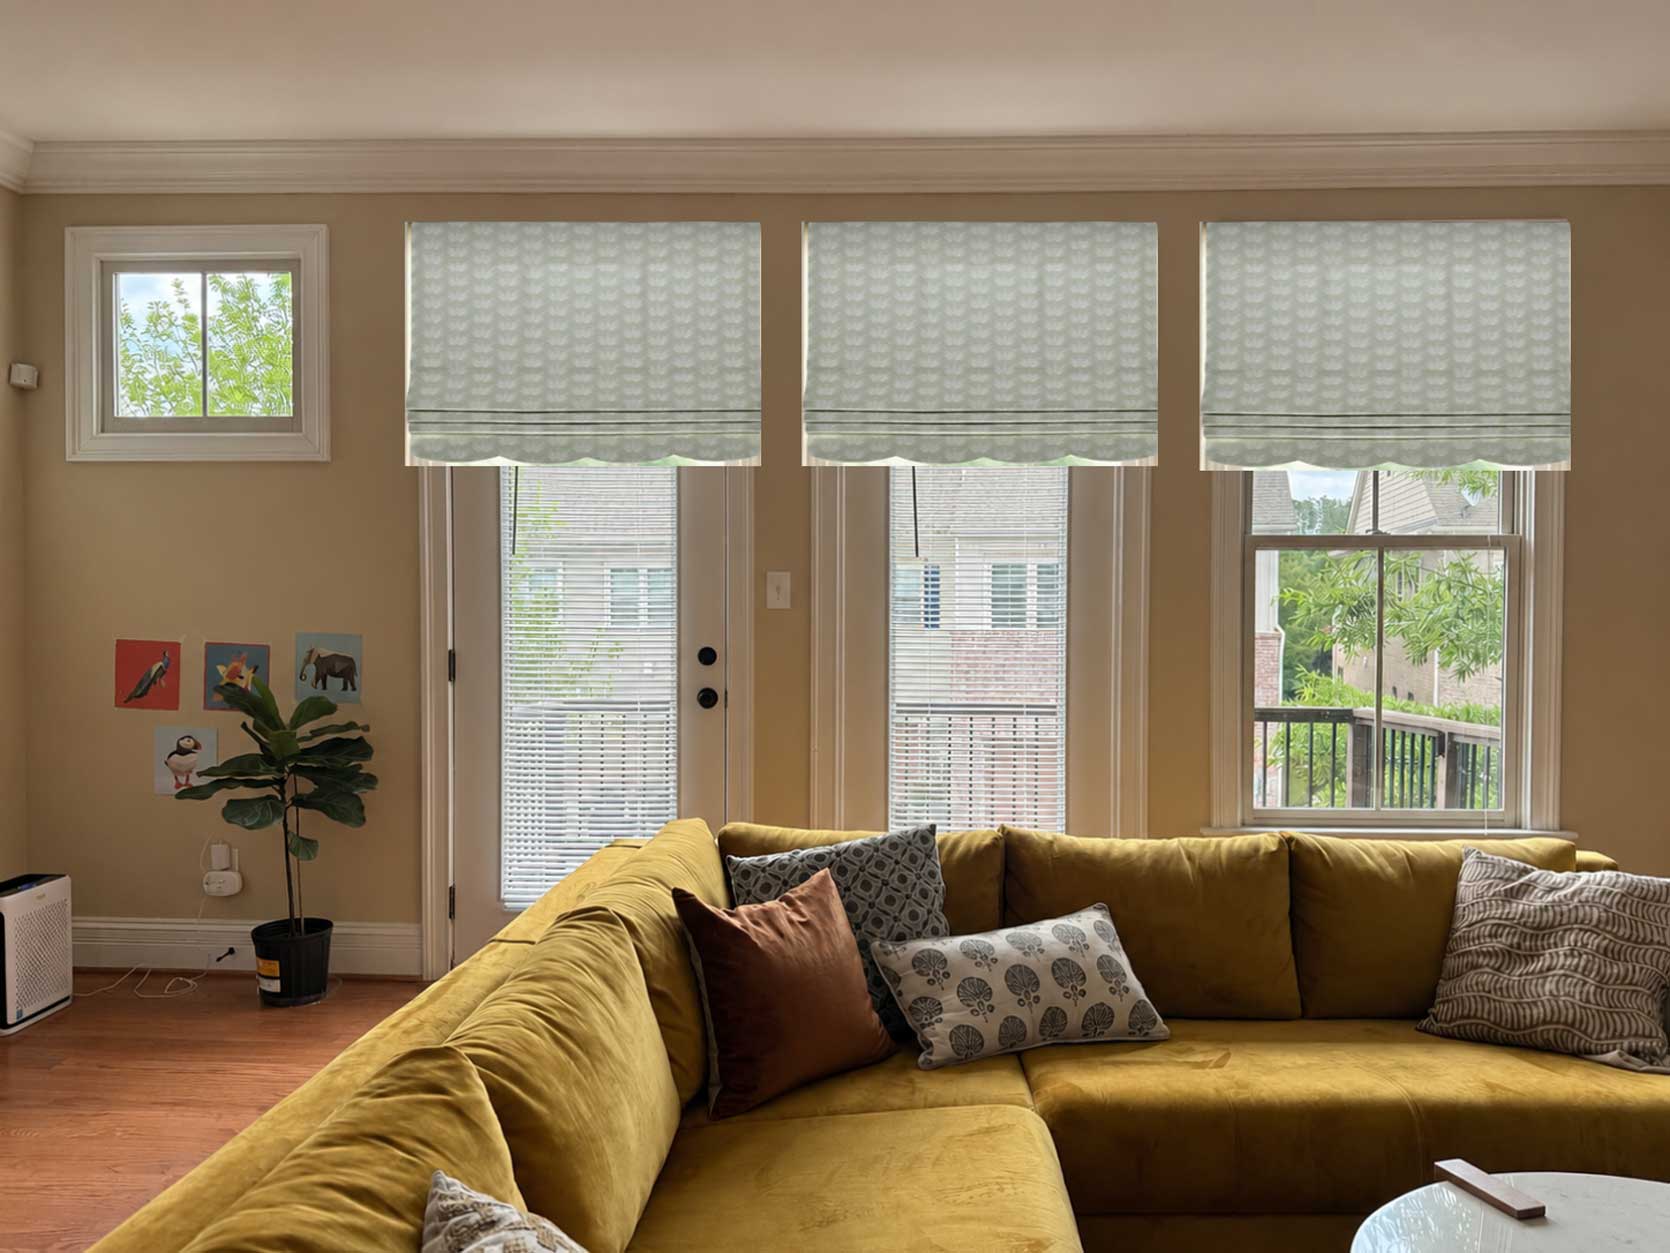
Given that the windows are slightly different heights, I’d want something that I could hang at the same level to hide that imperfection. In my case, Roman shades like the above wouldn’t *actually* work because of the door handle and lock protruding, but let’s say that was just a window, this could be a good way to make things feel unified. Hanging them as an outer mount would allow you to make the width of the shades the same, even if two ended up longer than the other when closed. I’d leave the small window in the left uncovered (and maybe even do a fun stained glass film or something to make it extra special (something I’m considering for myself).
Full Wall of Drapes
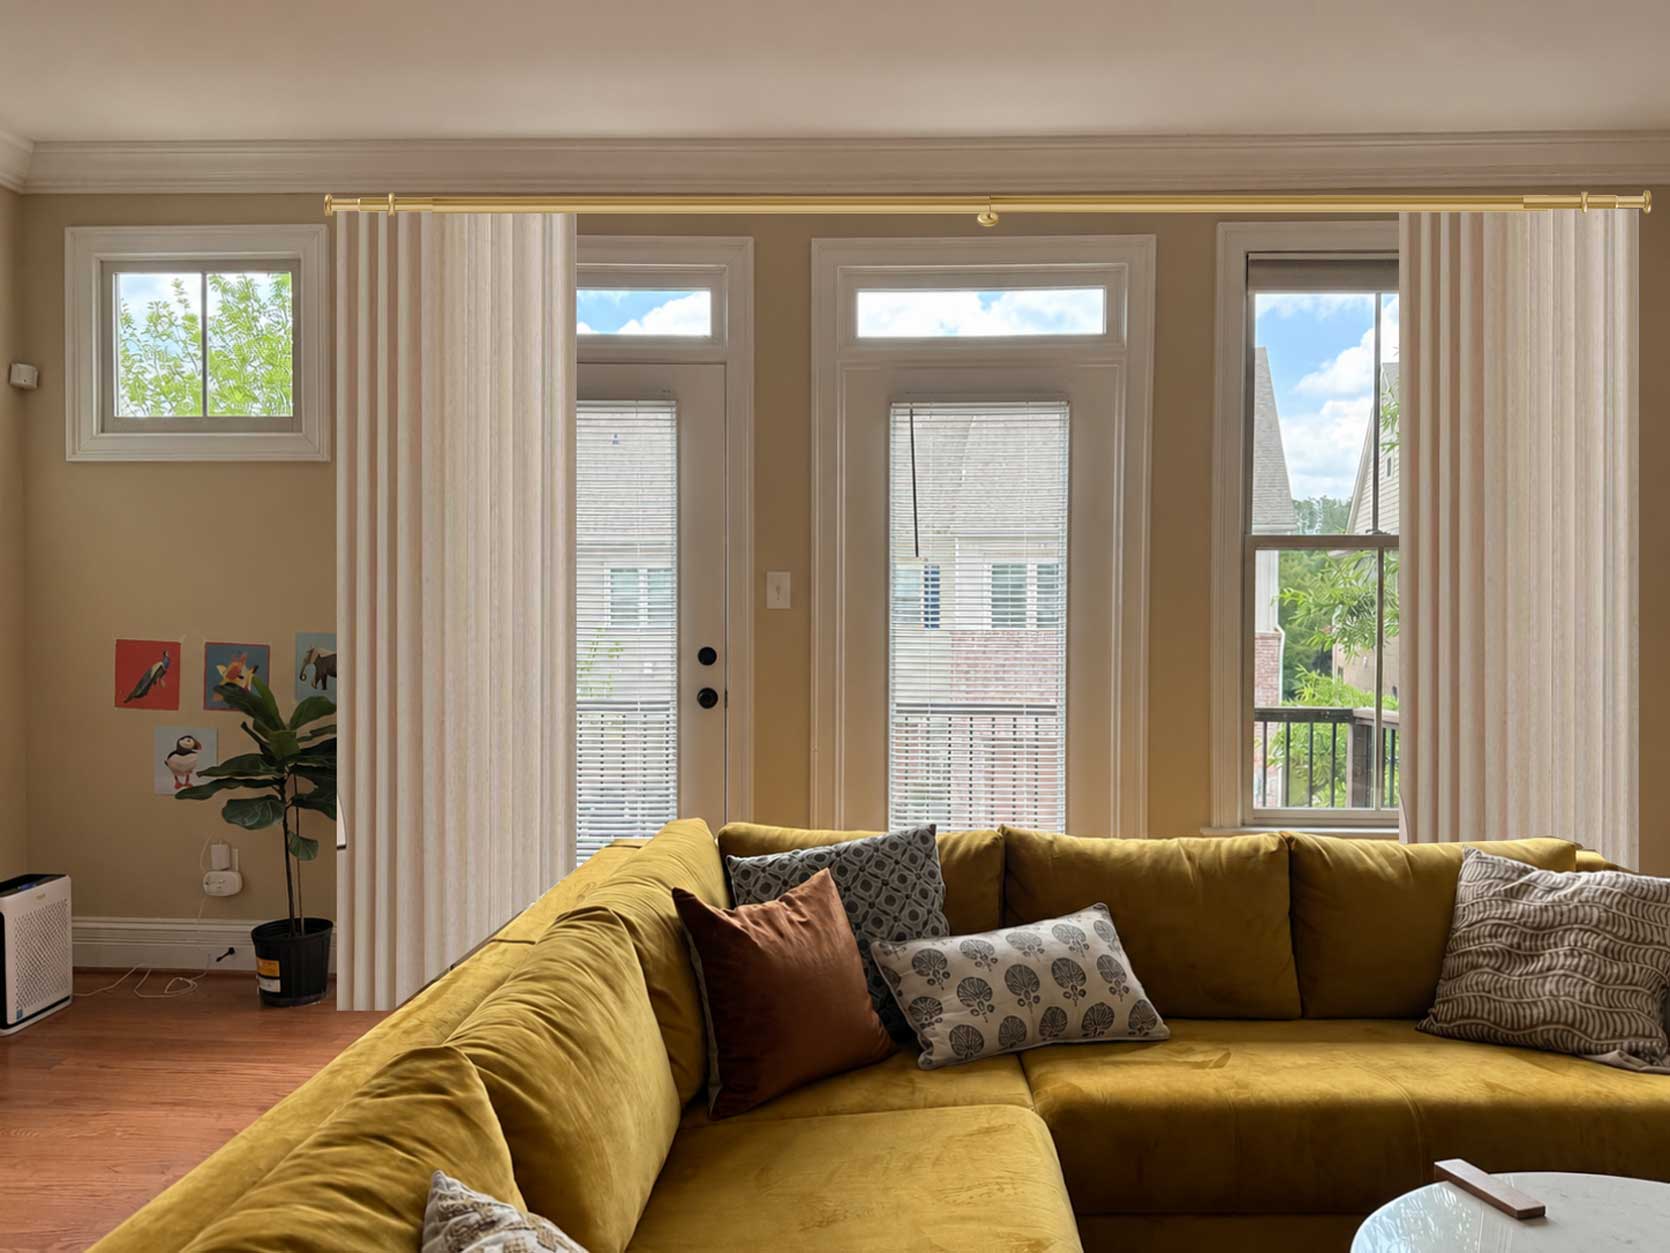
This option is far better for my home. When in doubt, take a wall of windows that are all over the place, and just hang one very long, very high curtain rod with lots of pretty drapes. This brings the eye to one key feature (the drapes) and ignores the fact that there are multiple sizes, types and heights everywhere. In my case, I’m considering some semi-sheers to keep it from feeling too heavy, as it can when you have as many panels as you would need to cover this stretch of wall.
Tricky Window #2: Arched Windows (Or Windows With An Arched Transom)
By far, this is the one type of window I get asked about the most. Every single home builder in the 1980s and ’90s decided that windows needed a surprised eyebrow above it. And most often, I saw it handled like this:
I’m all for a cellular shade in the right spot (they’re great at insulation for heat and sound, though not always the most aesthetic choice), but there are far more beautiful ways to cover a window of this variety, such as:
Draperies Hung High Above Arch
Similar to the solution for my uneven and mixed-size windows, one overarching (ha) drapery road with a wide span of drapery panels is a great design panacea. This window is of course outrageously gorgeous as it is, so it doesn’t need much.
Some people may be tempted to hang a rod right below the arch transom and then just ignore the top part, but this is a far better strategy. It makes the window feel far more grand to boot.
Custom Shade Or Blinds
Though I find the above technique perfectly suitable, there is always the option to go full on custom with a shade like above, or using hard window coverings like the plantation shutters below:
Draperies Hung Under Arch (Depending On Window)
I know I have advised against this one, but in some instances, it’s totally fine. When you have seperation between the arched transoms and the window or doors, you can totally get away with this.
No Draperies
Of course, you can always just…not cover the windows or the arches. Depending on the privacy of your property and your comfort level with looking outside at night or letting someone look in after dark (my husband would say ABSOLUTELY NOT!), you can skip the coverings all together.
After all, when your windows are this gorgeous, it’s pretty tempting to let them live 24/7 without any obstruction.
Tricky Window #3: Double Stacked Windows
You know double stacked windows: Multiple windows that run up a wall in a super high ceilinged room. I spend half my free-time either looking at homes to buy or second-hand furniture to buy, and anytime I come across a home with this style of windows in the living room, I’m tempted to keep on swiping. I just see $$$$. And while covering these types of windows is expensive, there are a few different ways to go about it.
Shade At Top & Bottom
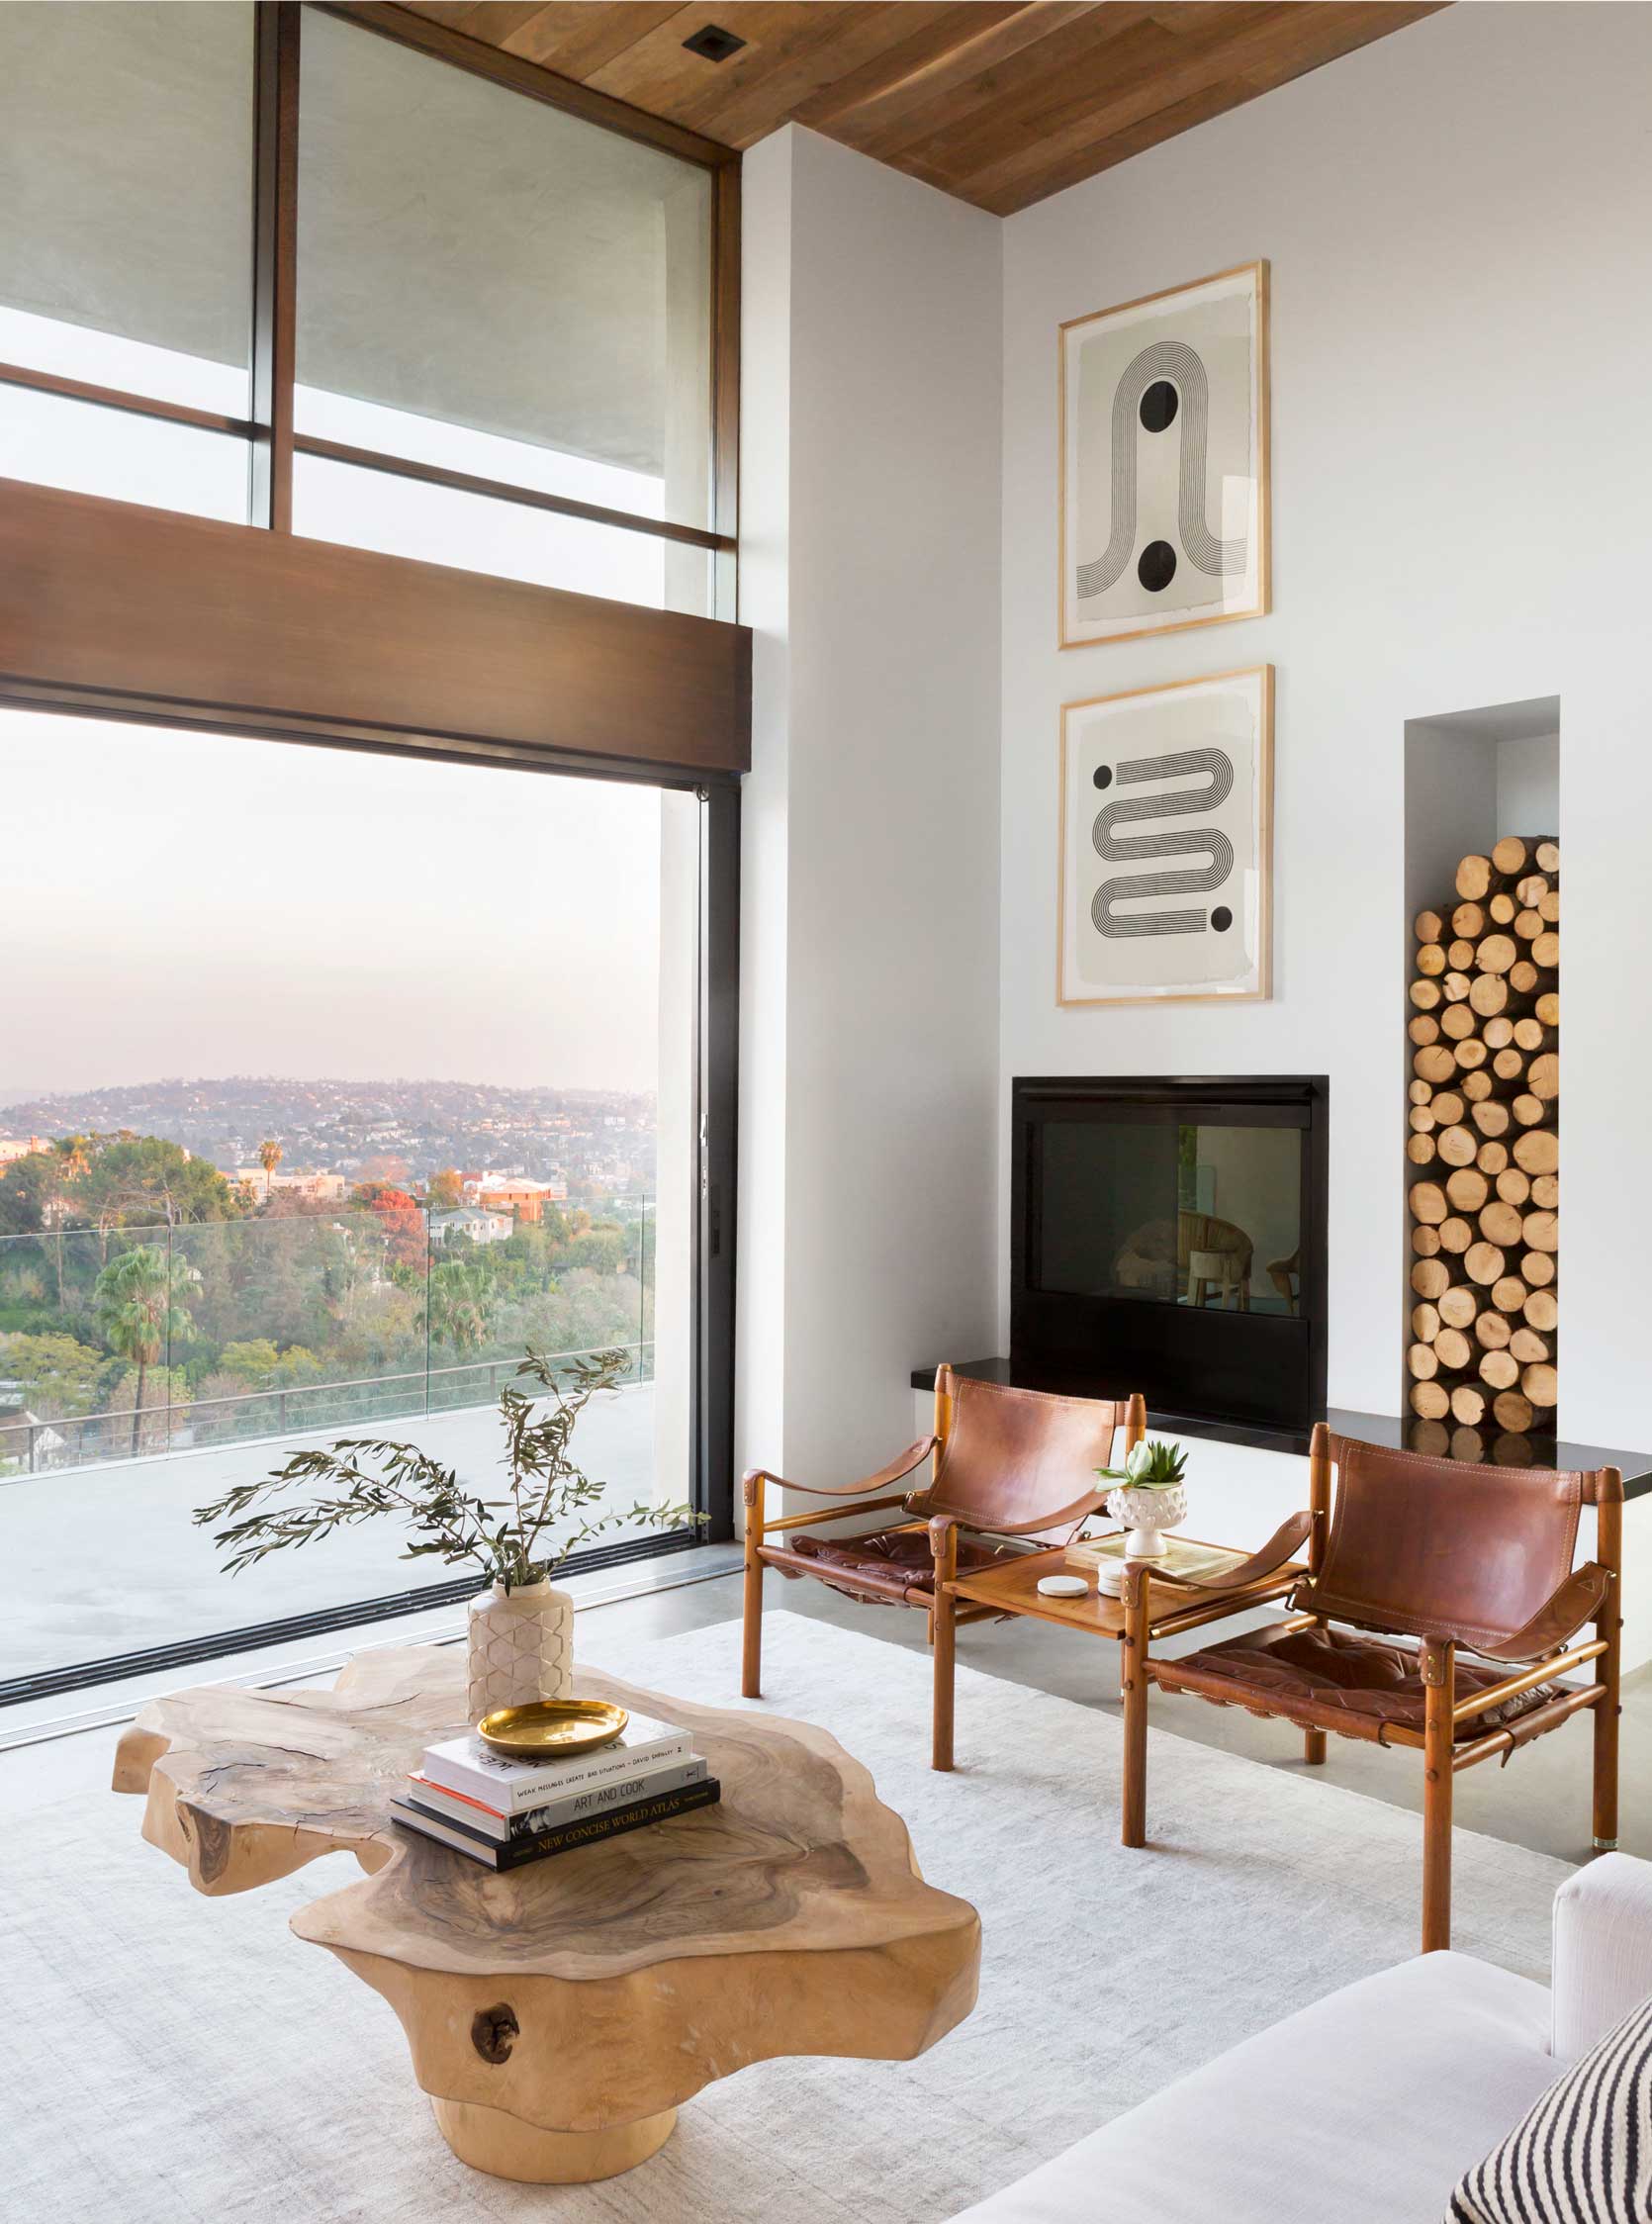
Not all homes need the drama of drapes when they bring all the drama themselves, either via the architecture or the view. Looking at the above, I realize now that the top part of this doesn’t actually show shades, but rather the concrete overhang from the exterior, but just squint a little and you’ll see the potential. But remember: If you use any window covering that high up, they need to be motorized or else they’ll either stay open or closed forever.
Extra Long Curtains
For anyone looking for significant elegance and drama, the custom super tall panels that go from your ceilings to your floor is the way to go. You’ll want to keep these neutral because otherwise, it’s the only thing that will draw attention in your space. With legs that long, it’s hard to look anywhere else, frankly.
No Top Covering + Drapery/Shade Bottom
You can’t see it in this photo, but the large bottom windows have shades that come out of the thin black bars above them. Leave the top alone if you’re not concerned with light spill or glare, and just spend your money on the bottom windows for privacy. You can also add a privacy or light filtering film to the top to tame intense sun.
Tricky Window#4: Bay Windows
I adore a bay window, especially one with a window seat. I aspire to one in our future home. But everytime I see one, I remember about my early days in the design world when I was helping my sister decorate her home and we were so lost about what to do in her breakfast nook bay window. I had no idea traverse rods existed, she didn’t have the budget for something custom, and we basically tried to invent something that already existed (a corner rod connector). Eventually, after much research, we stumbled upon a simple and cheap corner rod connector and boom, problem solved. But imagine if someone had just told me that was the solution at the get go. We would have saved so much time and headache.
Custom Rod
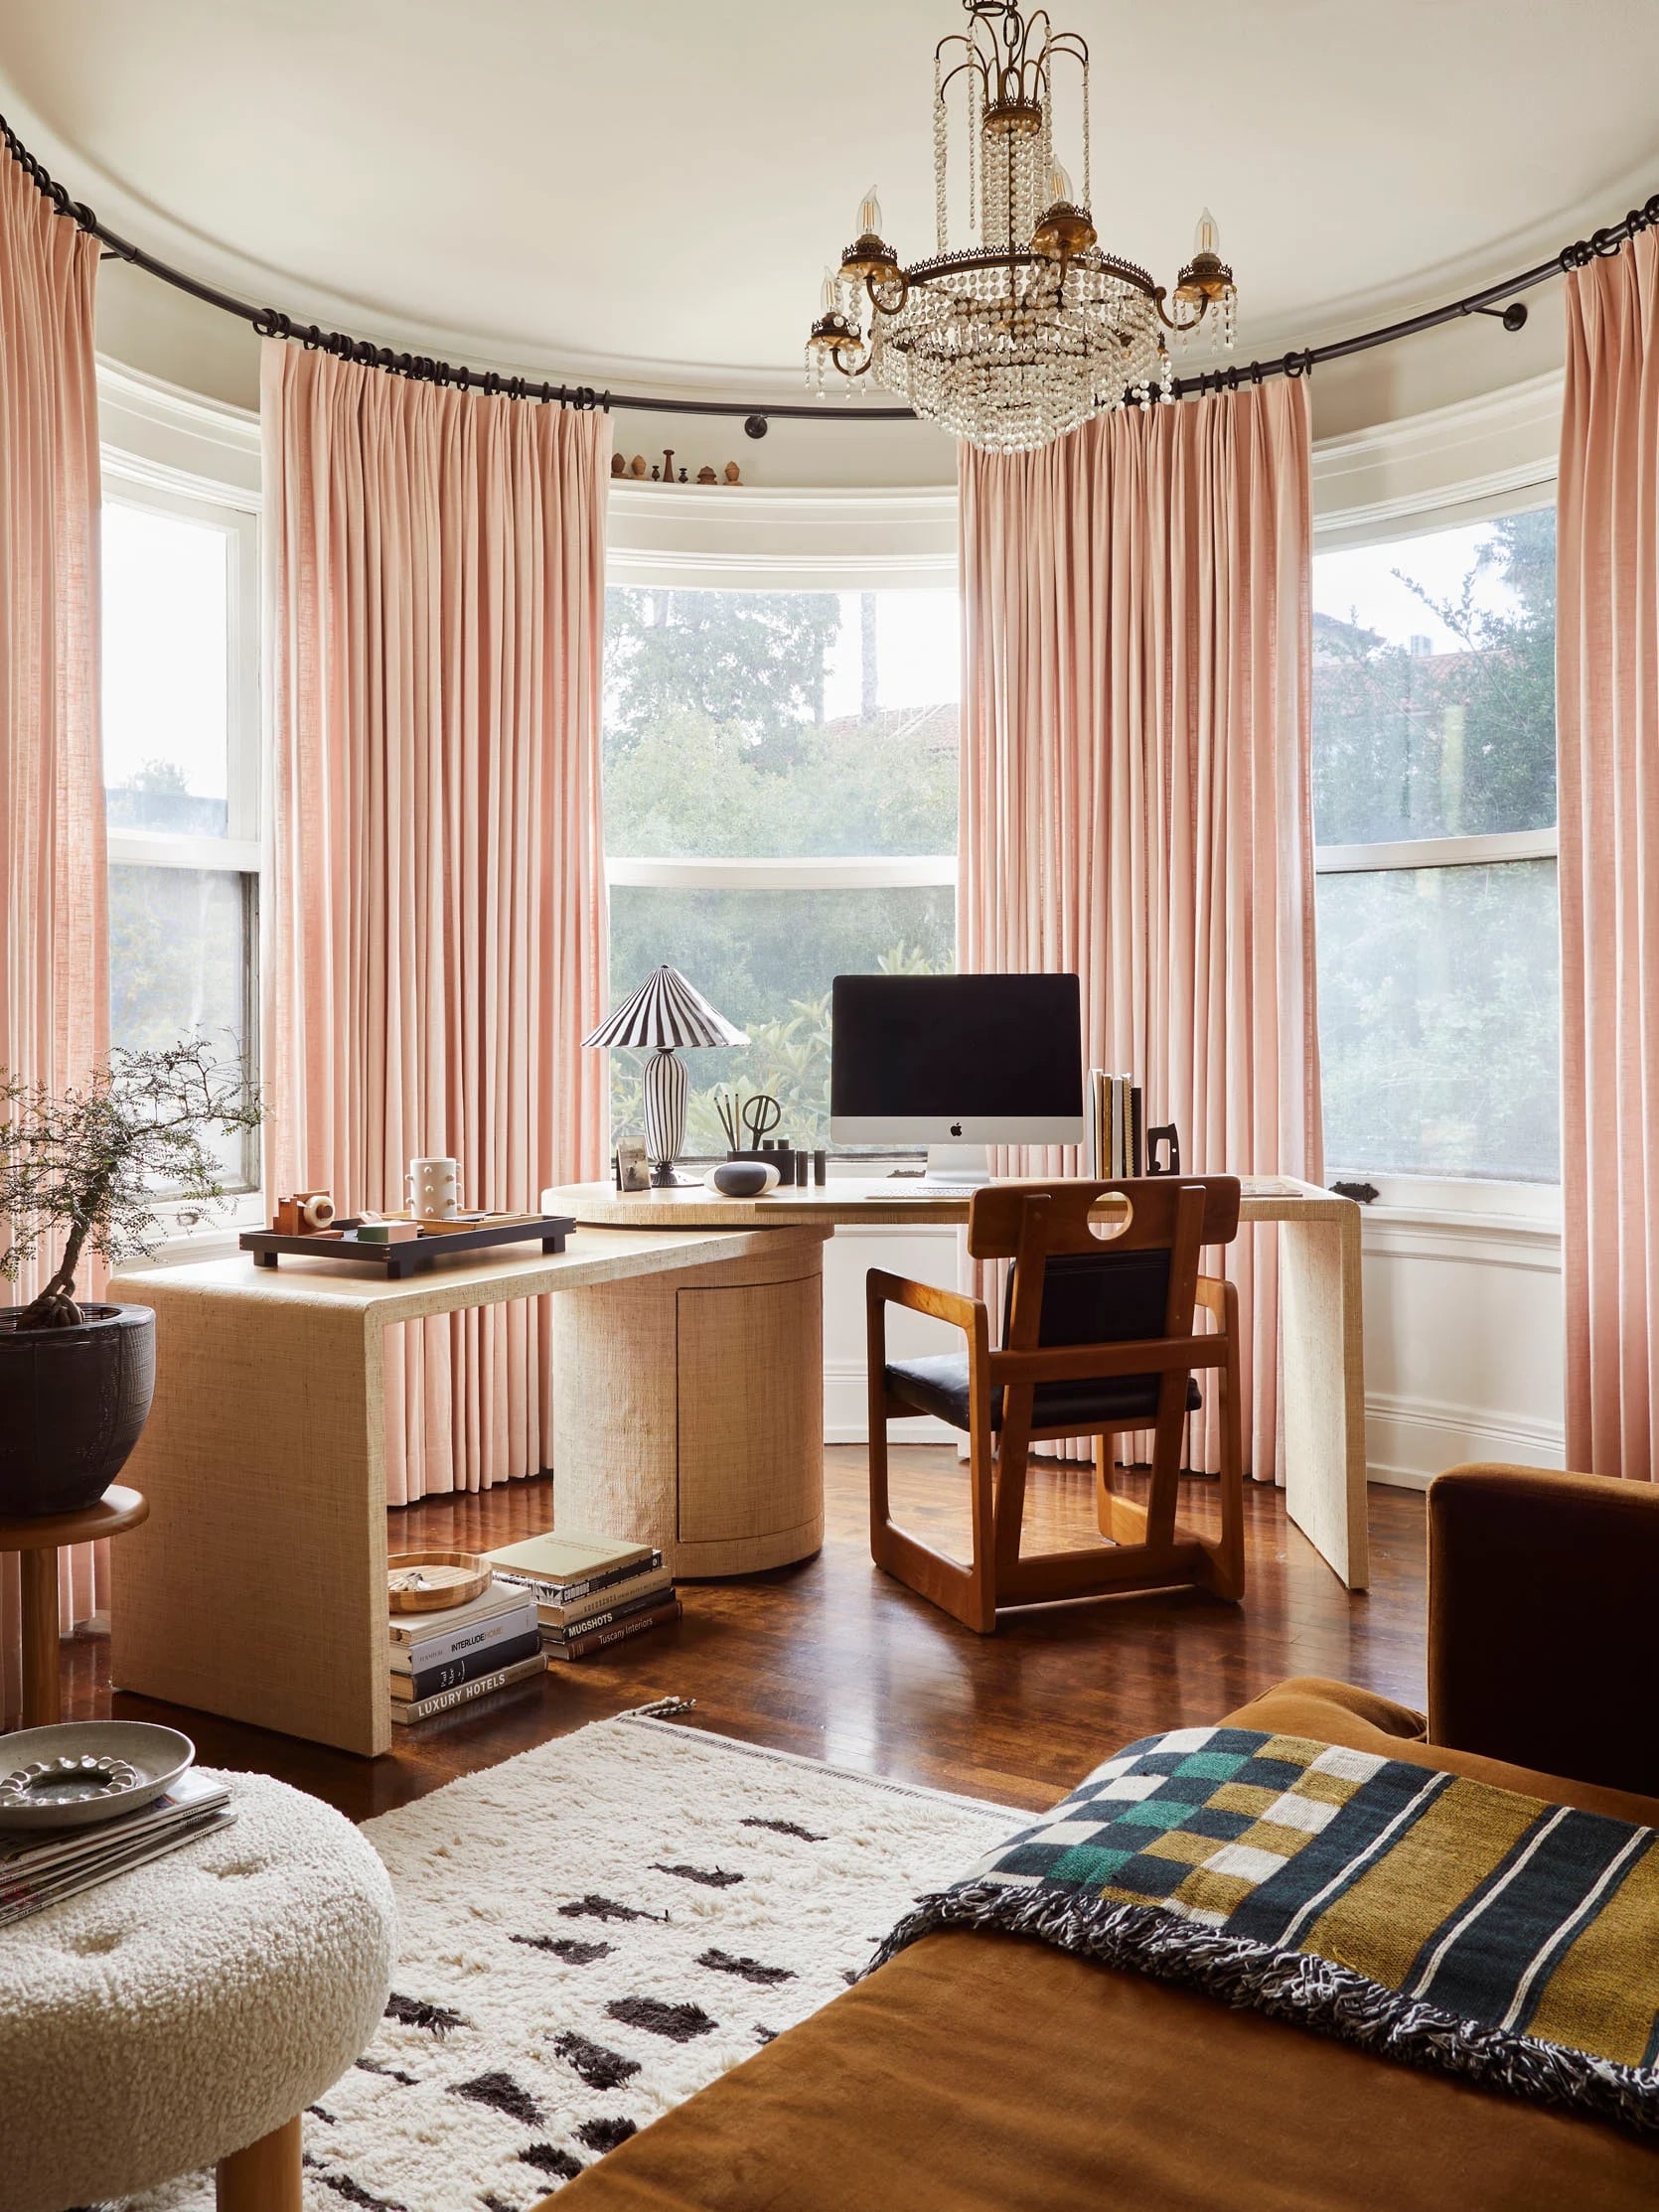
How lucky is Jess that this is the window in your main living space?!? I mean, have you ever seen something so unique? A round turret window! But covering that bad boy could only be done with a custom rod, which she worked with Decorview to design, manufacture and install.
Roman Shades
If you have a traditional bay window with corners, Roman shades are a great way to go about covering it. It’s tidy, casual and comfortable, and works especially well with a built-in bench underneath or even a compact seating area tucked into it.
Cafe Curtains (+ Romans Or Drapes)
I’ve made no secret out of my love of the cafe curtain, and for anyone who wants full coverage but charm, you can always mix Roman shades with cafe curtains
Angled Rod System (Off The Shelf)
The easiest and most affordable way to cover a bay window is to use a ready-made curtain rod system that accomodates the shape and angles. They come in different finishes, quality levels and price points. This one from Lowe’s is just over $50; Twopages sells one a bit more expensive but the styling (and likely the quality) is better. Another way to go is buying a pivot corner bracket like this one from Rejuvenation which adapts to the angle of your window and connects your rods together.
Tricky Window #5: Clerestory Windows
And finally, clerestory windows. Given their height and that they don’t really post any issue with privacy unless you had a taller residence right next to yours that could look down at just the right angle into your room, it’s not usually something people worry about covering. But in a space like a bedroom, if you need to block out light, you’ll want to know how to cover this thing.
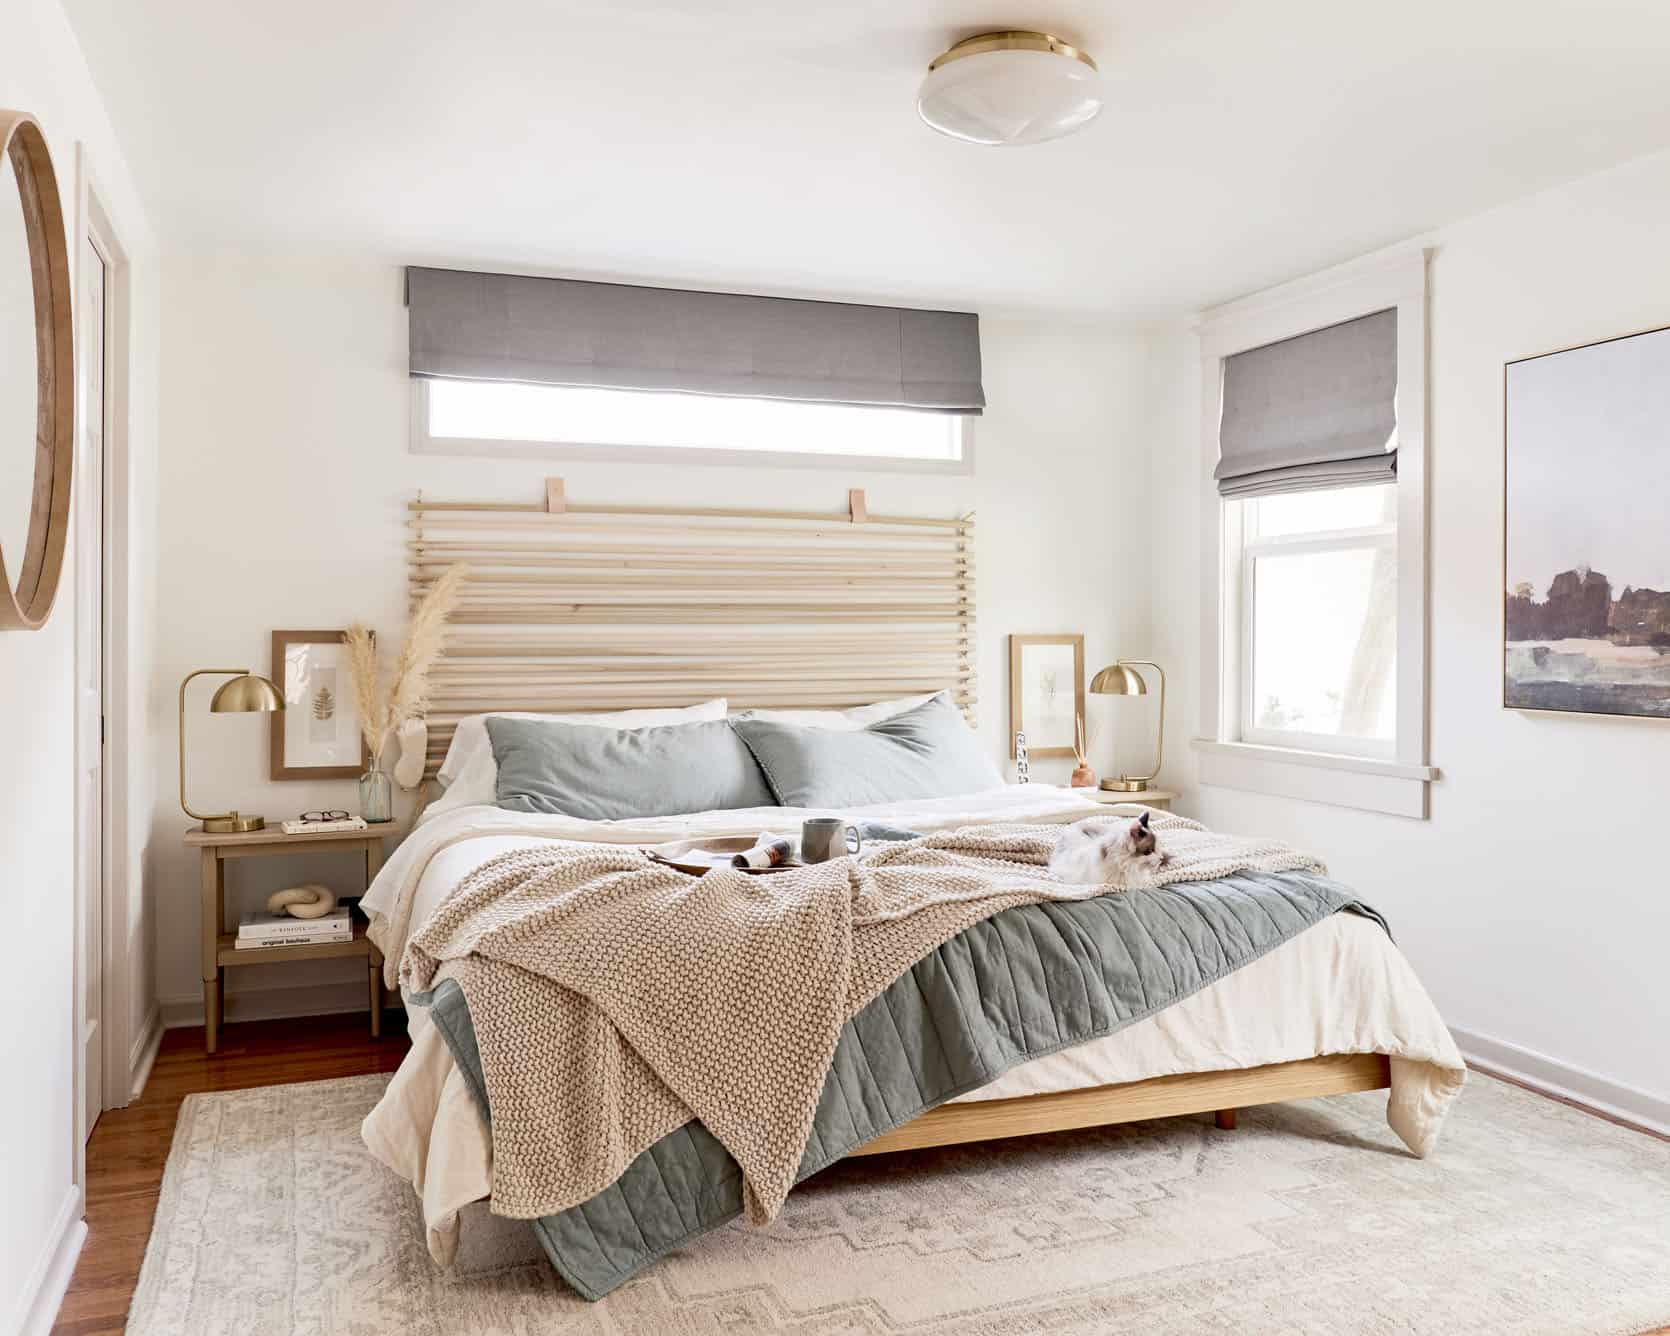
In the early iteration of Sara’s bedroom, she used a Roman shade (which she later removed in the final version of her bedroom). You’ll need to custom order one in the right size, so heads up that that’s an additional expense.
—
Got any other window quandries? While it feels like we’ve covered every question anyone could ever have, there’s always something more, so please drop those questions or ideas into the comments in case they inspire another post to help our readership.
Until next time, friends…
Opening Image Credits: Design by Jess Bunge | Styled by Emily Bowser | Photo by Sara Ligorria-Tramp | From: Makeover Takeover: It’s Finally Here…Jess’ Art Filled Living Room/Office Reveal


")


")

)")